Anyway.... Last week I received the Gearbox Adaptor piece, and I also gotten the Selector Shaft seal... After detailed analysis and measuring, I needed an 11/16" drill bit to drill a hole in the oposite side of the gearbox... The bad news... Do you know how difficult it is to locate a 11/16" drill bit in Perth, Western Australia!!!!!! After spending about a whole day looking and tracking one down, I finally have located one in Sydney. Anyhow... Below are a couple of pictures of the Adaptor as well as the selector shaft seal... (Please note the part number of the seal)


So... Here we are about to start with the engine removal. As most of you already know, the engine of the MR2 can realistically only be removed from below, so that means that the car needs to be lifted... In theory, this sounds easy, and if you have car hoist, it sure is... Alas, I don't!!!!!!!! Oh well... Bummer!
First off tho... we needed to disconnect all cooling lines, fuel lines, clutch lines, vacuum lines, other electrical cables, drive shafts, air-con lines, etc. This took us pretty much most of the morning, but relatively a straight forward exercise.
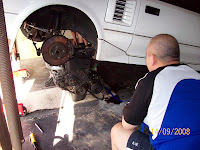
Anyway... Back to removing the engine from undernieth... This is how we did it... Unbolt the engine and drop it to the ground... then attach Engine Hoist to car, and lift backend of car up...


Lift the car up high enough... while one person carefully operates the engine hoist, get the other person to pull engine from undernieth... All up... 10-15 mins!!!!
This was an extremely dangerous exercise... I said to Sean prior to starting this... 1 Rule... Under no circumstance will anybody put their limbs under the car while it's up in the air...
we didn't... ;-) (As can be seen from the pictures) The strap was thrown across the floor... Sean was on one side, me on the other...


Easy!!!!! Engines out, put the wheel back on again, and let her down again... Our hearts can start beating again!!!!! This is now the second time I've done it this way... and I still can't get used to it.
Once the engine was out, we had it free-standing in the center of my garage, and could start with a close inspection of the 20 year old engine... and compare it to the new engine... There are many differences, and although they both carry the same designation (4age) they are totally different looking engine with many improvements... I think I'm gonna like this new engine... :D
But most of all... I was shocked by the condition of the engine.... Oil covered the aircon system and along the side of the engine... Corrosion on the cooling passages


Anyway... Time to move on, and stop winging about what was... and accept lessons learned.
Engine bay of the MR2 looks pretty empty!!!! Dah! We put some dents in the sides while removeing the engine... some scratches... but most of all... the engine is dirty with oil all over it.... It's time for a nice cleanup...

During the course of the removal, both, Sean and myself have managed to snap a few tools... Yes, it happens sometimes... Today, we snapped a Ratched (3/8" Head got twisted) and a 3/8" extension also snapped.... Oh well... Next week-end, I'll just have to get a couple of new ones...

Engine's out, and that is pretty much it for this session. Next week-end, we won't be able to work on the car, as it's Sean's son 2nd Birthday, Nicholas, and my niece's 11th Birthday, Claudine.
I might just do the odd bits-n-pieces, such as painting some of the components, etc.
More to follow soon...