Monday, September 29, 2008

Arrrrgh!!!!!!

Well... Yesterday, I gave it a miss, and helped out Sean to prepare his room for the new arrival into his family... So I was over at his place to help him out for the preparation.

Today, though, I decided to do some more cleaning, and the odd bits and bobs around... most of the engine mounts were covered in oil, and hence, the required cleaning...

So here I come with another bucket of soapy water... :-)... removed the engine mounts from the engine, and started cleaning them. Also, cleaned the engine mounts which connect to the chassis, and inspected them all in details...

On initial inspection, the engine mounts looked OK... but after a wash and closer inspection, it was obvious that they started showing their age... I could see minute tears in the rubber.


Also, after cleaning it in soapy water, the paint simply started pealing off freely, which was a bit of a worry...

I've also had a closer look at the 20v Engine mounts... that was the other reason why I decided to go with solid filled urethane mounts... The 20v Engine mounts are absolutely rock hard and solid!!!!! Those engine mounts make the 16v engine mounts look like chop-sticks!!!!! Alas, I forgot to take pictures, but maybe next week-end I will do so, just for documentation purposes.

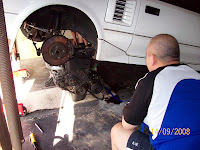
Anyway... also took the chance to remove the inside. Many people indicated that it was going to be very hard!!!! I didn't think so... it only took about 10-15 each to get to the picture below!!!! I used a pair of Tin-Snips to remove the center piece... then used an electric saw to remove the majority of the remaining rubber to get as close to the edge as possible. Alas, when I was looking for my wire brush, I couldn't find it, so it'll be until next week-end... :-( (I was searching for my wire brush for about 1 hr, and couldn't find it)


I also decided to give the aircon compressor a quick clean down, as you can see from my previous pics... it was UUuugly! It looked like new once I finished... ;-)


And removed and cleaned the engine mounts that were still attached to the old 16v engine... They still looked in pretty good shape...


Decided to call it the day... but wait... I still remember that I needed to remove the Speedo gearbox adaptor... OK... Well, I put plenty of CRC last week so that is could sink into the mounting. Nope... still wouldn't budge.... Put some more CRC and gave it another 30-40mins...

Nope still wouldn't budge.... performed this several more time, and finally managed to start turning (After remove the bolt and plate that was holding it in place) around in it's socket, using a blunt screw driver and a hammer...

Wait... one of those moments of my Super-Genius time... I should have stayed in bed this morning!!!!!

I looked at the thread and realised it's the same size as the Hub nut... Hmmm... Ok, super-genius goes and grabs it... and hey... I was right... it's a perfect fit... I screwed it in a couple of threads.. perfect... Put the bar to it, and it should just pop out, right!!!!!

It poped out all right!!!! matter of fact, instead of a pop, it went snap... Blink!!!!! Oh crap! I had snapped most of the thread off the speedo adaptor.... Arrrgh! So now I have a speedo unit that only has about 4-5 threads... and guess what... me super-genius had to do it again, and again snapped another 2 threads off... so now I only have 2x threads!!!!! Arrrgh!

After a lot of cursing and swearing, and slowly nudging it loose, back and forth with the screw driver and hammer, I finally managed to get it out.... but just... and it sure was dirty... and now ruined. First thing I did, was to check if it fit onto the speedo cable... Sure does, but only 2-3 threads / turns deep... dunno if this will do the trick... But boy, do I feel stupid!!!!

End result...


Might need to take a trip down to the wreckers next week-end instead!!!!!
&&^#%$^&*^%$&)(*!#%$^*&^%&^ (<== No translation required, I hope!!!)

Stay tuned, and the saga continues...

PS: Considering this is the first goofy mistake, we still not going too bad... :-)

Saturday, September 27, 2008

Cleaning..... :-\

Sean and myself decided to do some cleaning today... I've done some last week, but this week, we've decided to do a coolant flush and wash/clean down the engine back to get rid of all the oil.

I started a bit earlier, so I decided to assemble the selector shaft control arms... It came out pretty good. Greased up all the internals of the components. I've also dropped the part once or twice... No, not on purpose!!!!! And the paint is on there pretty strong.


Once Sean got here, we started by moving the car out into the drive way. It's amazing how easy it was to simply push the car out, as it's sooooo light!

First off, we started by flushing the coolant and heating lines, so we got out the long water hose, and simply ran water through the system for about 5-10mins for both systems. Obviously we needed to block and protect the aircon pipes, so that no humidity or water goes into these pipes. A couple of plastic bags and lots of tape... ;-)

After that, we proceed with cleaning the engine bay... Basically used simple washing liquid... I was not too keen on using degreaser, as degreaser could potentially attack the paint... that is what happened last time, and hence. A couple of brushes, and in I went. Without the engine in the car, the backend of the car sits considerably higher... making it more difficult to jump in.

Unfortunetly, my wife wasn't home, so no pictures... :-(

But we ended up taking pictures after all the work has been completed, as dark clouds starting showing, so we called it the day... Finished product for the day... A much nicer and cleaner engine bay... :-)


Thursday, September 25, 2008

Well... It was time for some more research and talking to friend and Collegues about various things... Some obvious, and some suprises...

Injectors:
I was recommended to get the injectors cleaning, and after contacting Warren @ Pricision Auto Care, he recommended that I drop the injectors by some time next week to get them nicely cleaned. So this will be a task for this week-end.

Spark Plugs & Ignition Leads:
I wasn't initially thinking about this, but somebody pointed this out... hence, I started looking into this. But I remember from my previous cars (Supra 1989 turbo), I always used iridium spark plugs from NGK... hence, I will be going with them again... Need to further investigate from the NGK website (http://www.ngk.com.au/). Need to give them a call... see if they have them in stock.

Eurothene engine mounts:
For a while I was contemplating if I should use them or not... after Sean, and Martin (Office Collegue, who used to drive a modified datsun) convinced me I should. So I will be looking into doing that this week-end as well. Yes, I will feel the vibration of the engine in the cabin... but hey, it's a sport car, right!!!!! ;-)

A bit of a scare...
I was following somebody's 20v BT conversion on the MR2oc forum... and they were talking about a 16v injector resistor pack... That really spooked me a little while, as both Sean and myself couldn't recollect removing or seeing one!!!! After posting on the forum, somebody enlightened me that the 87 to 89 didn't have one.... Phew!

Side engine mounts...
Some people who have done the 20v BT conversion have re-used their 16v engine mounts which is pretty much 1x Bolt + 2x Nuts... Some other have just re-used the 20v engine mount, which will allow for the 2x Nuts to line up... I'm still deciding which way to go... 20v Engine mount or 16v engine mount.... Will soon find out...

Come across some easy / Nice info...
While I was looking for some info this evening, I came across a web site that had a nice/easy layout and description of the 5 Natural aspirated variants of the 4age engines.
As you can see, my engine is the 2nd from the top, the 88Kw type. The blacktop is the last series of the 4age engine. I believe, and read, that the Head design of the 20v Blacktop was actually designed by Yamaha. Similar to the 3sgte head, which was also designed by Yamaha.
I'm sure I could keep on rattling about the 4age history, etc. But that is not what this blog is about. I've put this up as reference. If you want to know more about history of the 4age engine... Google it... ;-) There are some very good sites out there.

Anyway... that's it for now... Stay tuned ...

Sunday, September 21, 2008

This weekend, we didn't get much of a chance to work on the MR2. It was Nicholas' birthday, Sean's Son and it was my nieces birthday... We couldn't afford to miss out on those... :-) Sean had to prepare for Nicholas' birthday, and I had to buy a few presents for my niece.

I did manage to do a few little things in between... first off, was the Exhaust heat shield... it wasn't in too crash hot shape, with smallish rusty spots all over... so I gave it a quick sanding and a few layers of black paint... Of course the paint is rated at 1200Degree Celsius... so I don't think it will ever burn off....


... And since I was at it, I removed the selector shaft control arm, disassembled it, and gave it a good clean. Then masked up the areas I didn't want to get any paint on, and gave it a few layers of paint... They came out pretty good...


They were hung up to dry for a while, and then had to be backed in the oven to cure the paint...

I also checked the Selector shaft... All is good... :-) Mind you, the gearbox isn't in very good shape, and I'm glad to have the 20v gearbox that will be re-used.


After that, I had the opportunity to inspect the drive shafts... Do you know that the MR2 drive shafts are about 1 or 2mm thicker than the 20v, yet, the 16v is very similar weight. Of course the Long shaft of the 20v was a lot heavier than the 16v, and again, the 16v was 1-2mm thicker. Also, the 16v knuckles were a lot more flexible than the 20v, which I find odd, because the 20v was front wheel drive!!!!! Anyway... still contemplating which ones to re-use...


I've also checked the engine mounts... I had the opportunity to purchase the Urethane engine mounts inserts from the TwoRUs shop. I inspected the rubber, and there are clear signs of the rubber mounts starting to disintegrate/splitting... I'm still contemplating if I should or shouldn't, as I have hear rumours that they might have potential of tearing out the engine mounts.... Anyway... Pictures of the engine mounts and urethane inserts. Please note, the smaller diameter mount is a lot more riggid than the bigger one... The small one is fitted to the back of the motor, whereas the bigger one is towards the front of the engine...


I also decided to re-install the aircondition unit, but this will be in the process of re-assembly... I might as well, but I will be re-using the MR2 aircon compressor, so I took the opportunity to check and compare both the 16v and the 20v aircon compressor. Oddly enough, the 16v Compressor is much larger than the 20v, but then again, that is understandable, as it goes from the front to the back, and then back to 1/2 way into the cabin... so a considerable amount of piping the aircon unit needs to push compressed gases through. Also, another odd thing about it, is that the belt has an additional rib (IE: Wider belt) and the pulley is a lot larger than the 16v counterpart... Anyway... pictures tell a lot more... ;-) (Obviously, the oily/dirty unit is the 16v item)...
That is pretty much all I managed to do this week-end. Smallish stuff, but had to be done...
Next week-end... Not too sure if we will get much done, as Sean's wife is expecting child #2...
Apparently, Sean's going to be a "Sugar Daddy"... ;-P... IE: Daddy's little girl.
So we might do a little bit of work on the MR2, but also will be preparing the nursery for Sean's new arrival. It certainly is a very exciting moment with Sean's new arrival coming soonish... I think it's about another 3-4 weeks when she is due to arrive...
Got an e-mail from Doug... The harness has been completed, and is ready for shipping. Doug is just waiting for the rest of the components, such as coolant hoses, vacuum lines and fuel lines to arrive, and he will then be sending it back.
I have also been requested by a colleague of mine who is following this, to allow reader's comments... well.... it's now open. The blog is pretty much up to date now, so from now on this is the stage I'm at... So stay tuned... :-)

Sunday, September 14, 2008

Now that the harness is out and has been sent to Doug, it's about time to start on the enigne removal... FFFiiiinnnnalllyyy!!!!! Mind you, there were a couple of suprises, which will be revealed later.

Anyway.... Last week I received the Gearbox Adaptor piece, and I also gotten the Selector Shaft seal... After detailed analysis and measuring, I needed an 11/16" drill bit to drill a hole in the oposite side of the gearbox... The bad news... Do you know how difficult it is to locate a 11/16" drill bit in Perth, Western Australia!!!!!! After spending about a whole day looking and tracking one down, I finally have located one in Sydney. Anyhow... Below are a couple of pictures of the Adaptor as well as the selector shaft seal... (Please note the part number of the seal)


So... Here we are about to start with the engine removal. As most of you already know, the engine of the MR2 can realistically only be removed from below, so that means that the car needs to be lifted... In theory, this sounds easy, and if you have car hoist, it sure is... Alas, I don't!!!!!!!! Oh well... Bummer!

First off tho... we needed to disconnect all cooling lines, fuel lines, clutch lines, vacuum lines, other electrical cables, drive shafts, air-con lines, etc. This took us pretty much most of the morning, but relatively a straight forward exercise.

Anyway... Back to removing the engine from undernieth... This is how we did it... Unbolt the engine and drop it to the ground... then attach Engine Hoist to car, and lift backend of car up...


Lift the car up high enough... while one person carefully operates the engine hoist, get the other person to pull engine from undernieth... All up... 10-15 mins!!!!

This was an extremely dangerous exercise... I said to Sean prior to starting this... 1 Rule... Under no circumstance will anybody put their limbs under the car while it's up in the air...
we didn't... ;-) (As can be seen from the pictures) The strap was thrown across the floor... Sean was on one side, me on the other...


Easy!!!!! Engines out, put the wheel back on again, and let her down again... Our hearts can start beating again!!!!! This is now the second time I've done it this way... and I still can't get used to it.

Once the engine was out, we had it free-standing in the center of my garage, and could start with a close inspection of the 20 year old engine... and compare it to the new engine... There are many differences, and although they both carry the same designation (4age) they are totally different looking engine with many improvements... I think I'm gonna like this new engine... :D

But most of all... I was shocked by the condition of the engine.... Oil covered the aircon system and along the side of the engine... Corrosion on the cooling passages


Anyway... Time to move on, and stop winging about what was... and accept lessons learned.
Engine bay of the MR2 looks pretty empty!!!! Dah! We put some dents in the sides while removeing the engine... some scratches... but most of all... the engine is dirty with oil all over it.... It's time for a nice cleanup...


During the course of the removal, both, Sean and myself have managed to snap a few tools... Yes, it happens sometimes... Today, we snapped a Ratched (3/8" Head got twisted) and a 3/8" extension also snapped.... Oh well... Next week-end, I'll just have to get a couple of new ones...


Engine's out, and that is pretty much it for this session. Next week-end, we won't be able to work on the car, as it's Sean's son 2nd Birthday, Nicholas, and my niece's 11th Birthday, Claudine.

I might just do the odd bits-n-pieces, such as painting some of the components, etc.

More to follow soon...

Sunday, September 7, 2008

MR2 is finally off the road and into the workshop...

Well... It was about time that the MR2 gets pulled off the road, and into Workshop... I've managed to grab a couple of days off, so I managed to get a few things lined up/sorted and work on the car as well.

Some of the things I had to sort out prior to starting...

  • Exhaust system... The current exhaust system is in very bad shape. It's been on there from the previous owner, and has been shopped, swapped, butchered, raided, repaired and just about everything else under the sun you can do with it. It looks worse than a dog's breakfast!!!! It's time for a change and the person I would mostly trust and has a very reputable name is Norm Buttler of Buttler Exhaust Shop. I've heard his work before, and he's probably been around for more than 10+ years... So I paid him a visit... Firstly, so I could meet the famous Norm Buttler, and 2nd, to get an idea what he could do, and how much it would cost.... This is all sorted, and hopefully, once I've finished the engine, the MR2 will be rocking up at his exhaust shop.

  • New Selector shaft seal... I went past Toyota spare parts shop to purchase a new Selector shaft seal... About AUS$93 later, with selector shaft on the way from eastern States and about 8Litres of Toyota coolant, which I required as well... Thought I might as well give the cooling system a flush, since I'm at it... ;-)
The primary focus for now was to get the harnesses of both, the MR2 and the 20v BT removed, so that I could send it to Doug (MR220v) for him to perform his magic, and splice them together.

We ended up putting the MR2 onto a couple car ramps, and removing various panels of the back of the MR2... Bonnet, Boot, Side Covers (Both sides), internal trimming of the boot, etc...


We pretty much started unbolting/removing any electrical connection... Pretty straight forward and nothing that special... this must be about the 3rd time I have removed or disconnected the harness from this car... I pretty much know the MR2 harness off by heart... ;-)


We pretty much spent all of Saturday afternoon and Sunday morning working on the MR2 to get the harness removed... the most difficult was the removal of the electrical connectors to the Starter motor... There are 2x connection, 1 being for the full voltage, and the other being a signalling or switch cable. The Full voltage one is a simple Nut that needs to be loosed, and the switch cable was a plug that needed to be pitched and then pulled.... Yes, 2x Long screw drivers, a pair of pliers, a flash light, and a lot of cursing and swearing... we got it out and voila...


We had to remove the exhaust just to get to the connectors of the Starter motor... after removing the exhaust... As I was commenting previously... it is in pretty bad shape...


One thing I was shocked by, was the condition of my engine from undernieth... It's been probably in excess of about 3-4 years since I have inspected the MR2 from undernieth, as I always had the oportunity to do so when it was in at my other best friend's workshop, Jan's workshop. I used to hang about there every week-end, and Jan has taught me a lot about cars and the mechanical side... If it wasn't for him, I wouldn't be doing this today...


Anyway... I also ended up removing the under-tray of the MR2.... and that was totally shot, torn up, broken bits, etc... I need to find a replacement, although it's not very important. The only purpose of this, apparently, is so that not too much dirt gets into the engine bay... With the new engine going in, I definitly need to find a replacement... but for now, I'll leave it off. It is totally covered in oil...


The next task was to remove the engine harness from the 20v Blacktop engine, which was pretty much a 10-15mins affair, as the majority was already done. As you can see from the picture below, the 20v BT engine harness is considerably more complex than the 16v Harness. From the picture below, you can pretty much see/compare the 2 harnesses, where the 16v harness is towards the back and the 20v Harness is in front.


I've given the harnesses a quick inspection to see if all is OK, and no broken connectors, and pretty much wrapped it up into a box ready for delivery to Doug. I'm a little anxious about sending it this far, but it turned up successfully at Doug's door step about 5 days later.


Task for this week-end has been successfully completed... The next task is to start with the removal of the 16v engine from the MR2... This is next time... ;-)